Producing synthetic corundum (Ruby/Sapphire) with CO2 lasers

One of the benefits of working in a school design technology department is that I have access to a range of materials and a co2 laser cutter. Also it helps being on good terms with the science department too. So I decided to run some experiments making crystals under laser conditions. The first crystal I was successful in producing was halite. So this set the course for something more ambitious.

I went to the science department and asked for some aluminium oxide (Al2O3) powder as well as trying my luck for some powdered dopants (Chromium, Titanium and Iron).
Out of the dopants however they only had iron powder. This did present a problem though. Iron powder of that purity is highly oxidising and presented a risk of a metal fire. And it also occurred to me that they are the ingredients used in thermite. So I went away empty handed at first.

After some thinking, I realised I had plenty of steel lying around. Steel as people know is a iron based alloy. I have lasered steel plenty of times before without issues. I was still nervous of lasering it in powdered form, but figured the contaminants would lessen the risk of drastic oxidisation. So I got myself some paper and a steel block, and began filing away creating steel dust.

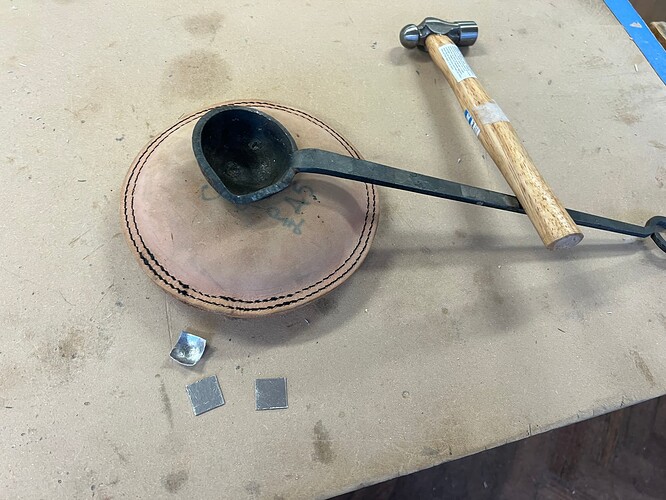
The first step was to cut some 30-40mm aluminium squares and beat them to create a parabolic like dish.

The next step was to put a small heap of aluminium oxide into the aluminium dish.
The idea was the parabolic shape would help focus some of the laser into a point within the medium. Aluminium is typically a reflector at IR wavelengths.
And then I sprinkled some steel dust on top.

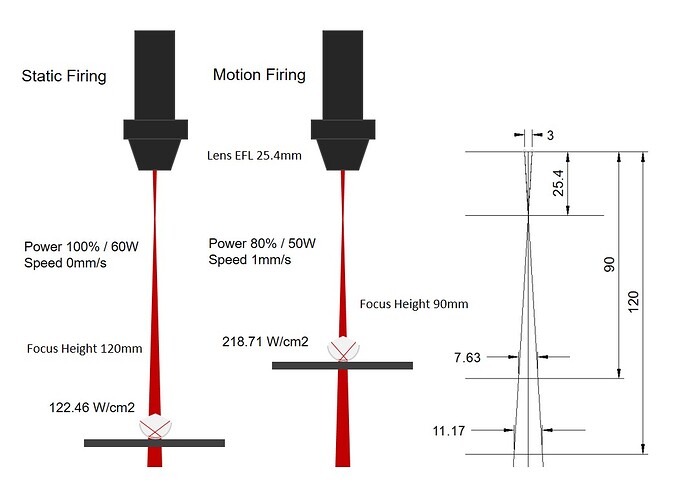
I tried static firing with the laser defocused to a focus height of 120mm first. Setting the laser to fire automatically runs at 100% power, which is 60W in this case. The focal length of the laser lens was 25.4mm and the beam diameter of a CO2 laser is typically around 3mm so I was able to estimate the spot size and therefore the intensity at this height.

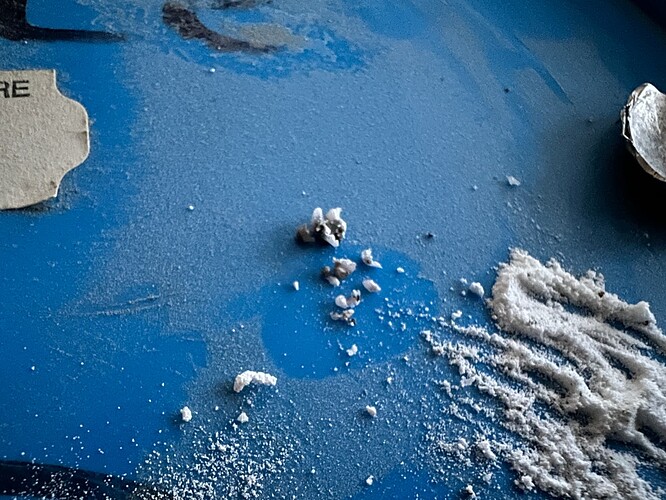
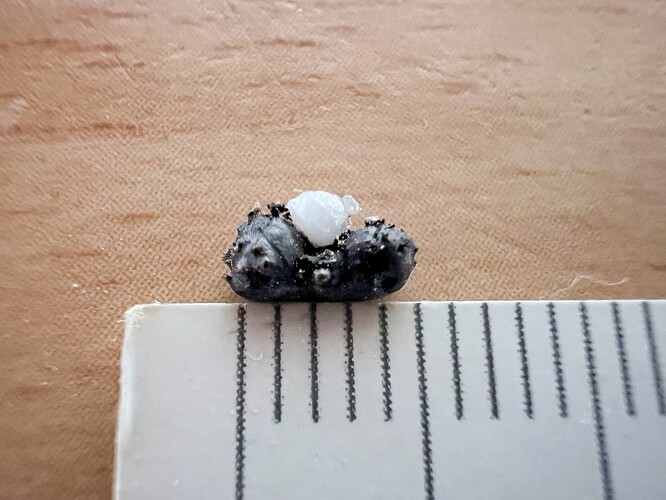
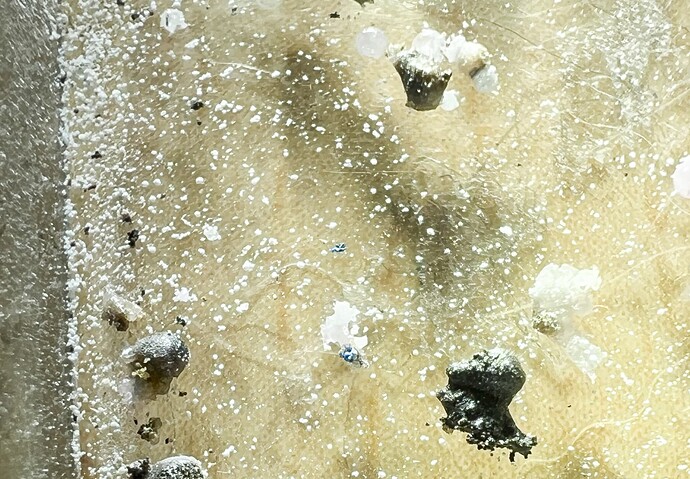
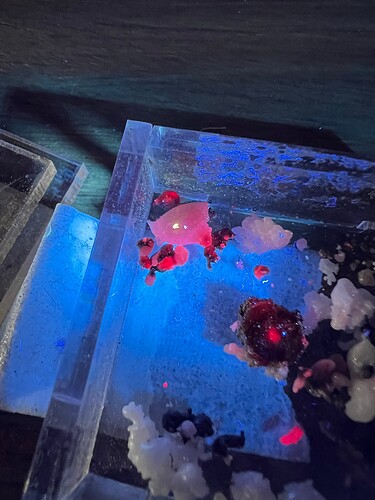
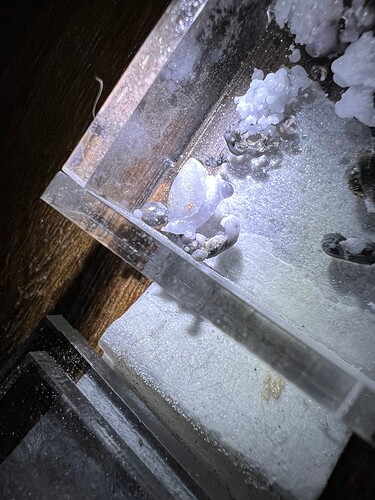
This was the result of the first spot firings.

Bingo, corundum crystals!
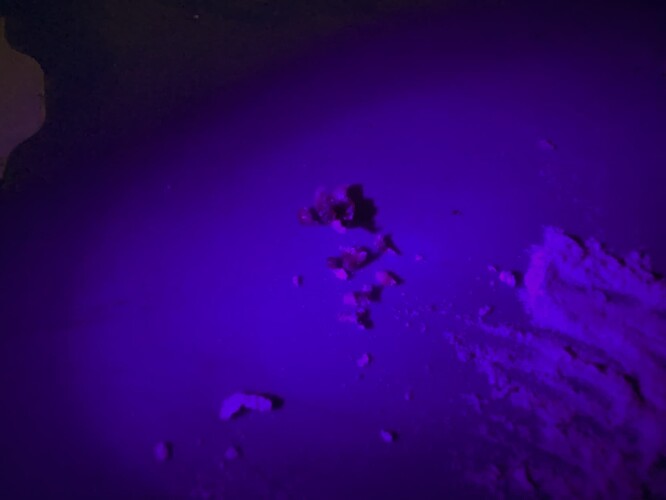
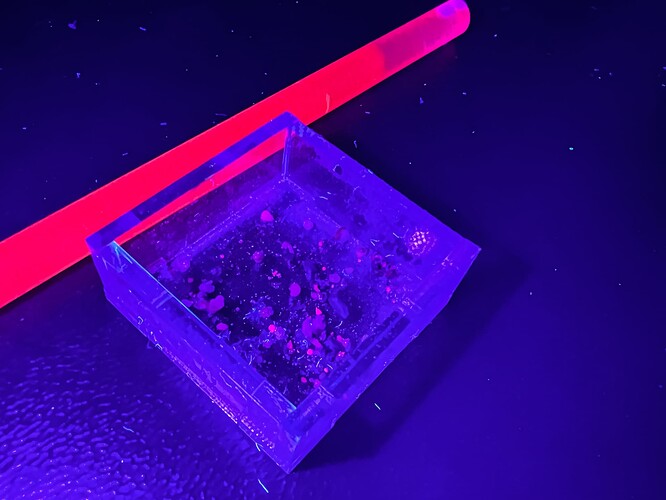
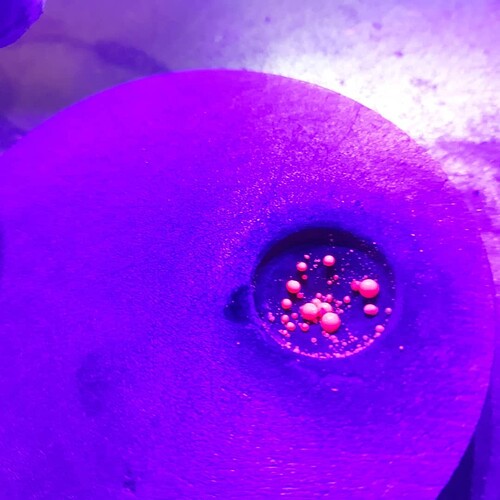
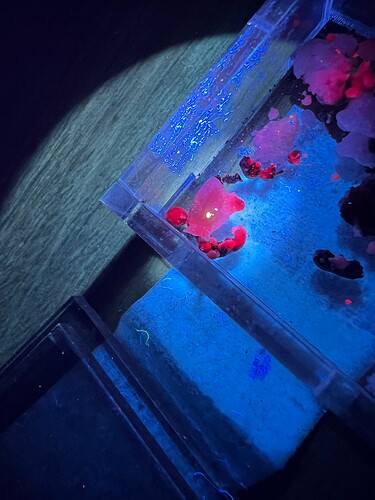
What surprised me also was the production of ruby. Then I figured the steel I used must have been an old piece of stainless steel which contains chromium. Using a small 395nm torch I was able to fluoresce the ruby crystals further confirming them.

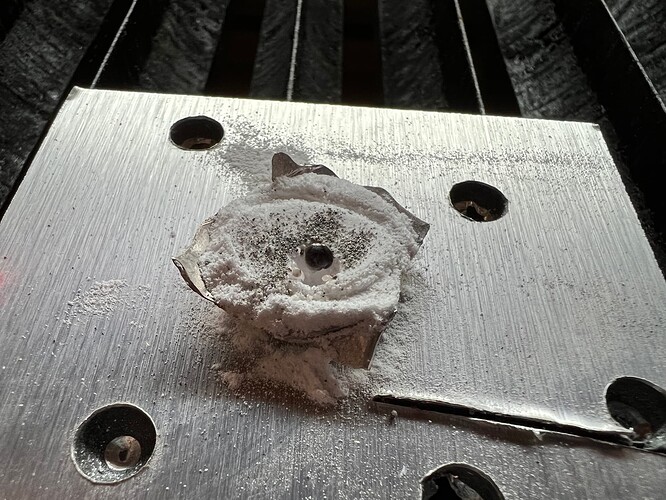
Now it was time to improve on things. The previous firing took a while to heat the aluminium oxide to exceed 2072°C that it needs to become molten. I decided to decrease the focal height to 90mm increasing the laser intensity.
This was the result:

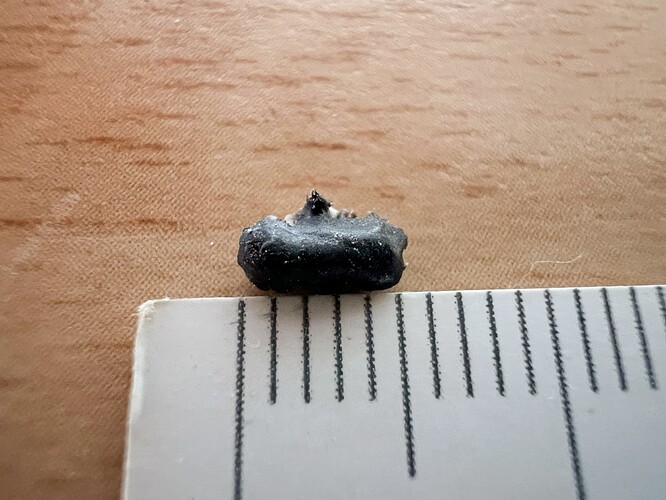
The result produced a single black sapphire and surrounding microcrystal of ruby.

After more runs I found that if I moved the laser head manually by a couple of mm whilst the aluminium oxide was still molten, I was then able quickly heat the surrounding powder and add to the previous crystal through coalescence. The coalescence was random and sometimes it contributed to the original crystal or it began forming a new one.

Once the aluminium oxide was hot enough I found it took very little to melt the surrounding oxide to the point I could now have a slow travelling beam.

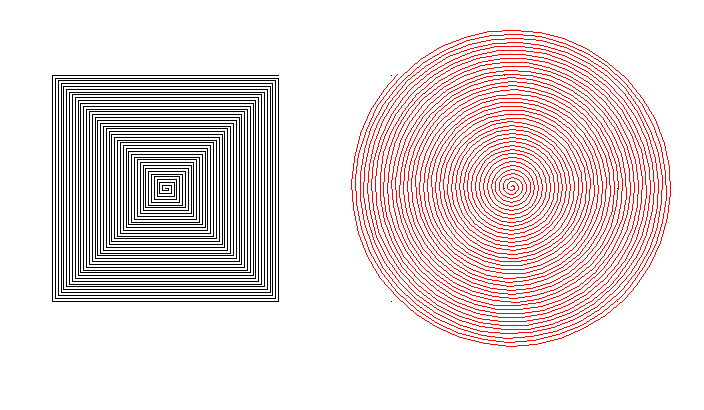
So I adopted this 10mm square cut route. I set the laser to travel at 1mm/s at line intervals of 0.125mm.

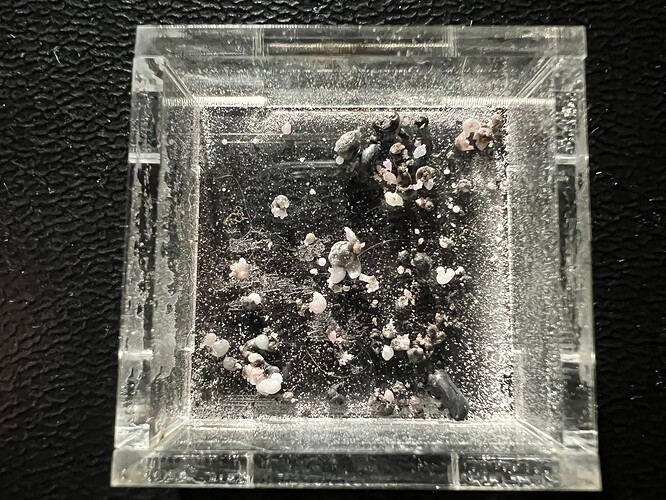
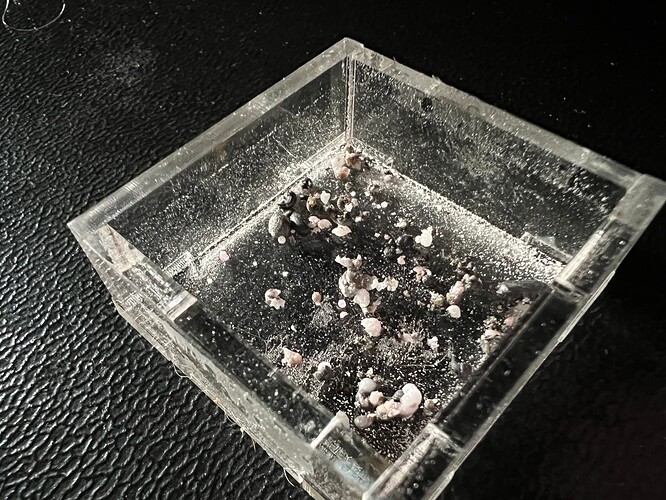
After a full pass I was able to gather a nice collection of rubies and sapphires.

I didn’t have time to get myself a sieve so the container contains some aluminium oxide powder as well.

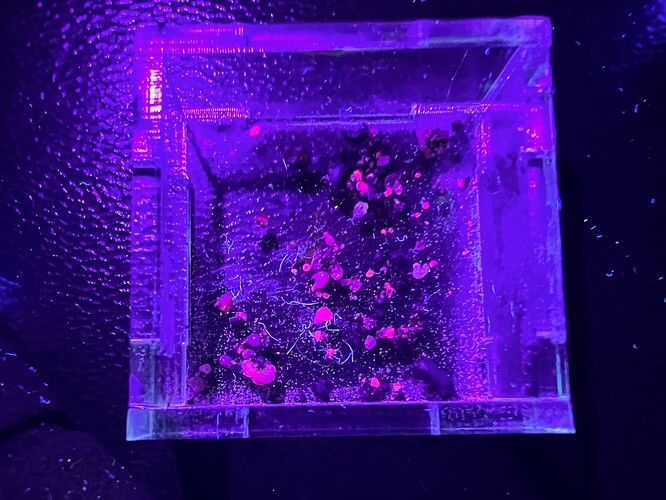
And now the fluorescence shots! :slight_smile:

Using steel dust as a dopant produced some interesting results and potentially rare raw crystals. I have a couple of samples that have coalesced together containing ruby, clear sapphire and black sapphire. There also appears to be pale yellow variety present. I am yet to produce the classic blue sapphire.

To improve things further I am going to try a couple more things.

  1. Adopt a circular spiral cut route. This is to hopefully allow a singular central crystal to grow outwards.

  1. Mix a higher concentration of steel dust thoroughly into the oxide powder. Hopefully stronger doping may occur. I saw some evidence in microcrystals that produced very red rubies.

  2. Potentially invest in pure chromium and titanium powders to try out creating higher quality and purer Cr:Al2O3 (Ruby) and Ti:Al2O3 (Titanium Sapphire) crystals.

  3. Produce crystals on a layer basis. I’ve proved I can remelt and coalesce the oxide horizontally so there should be no reason I can’t build on them vertically.

  4. Risk using small quantities of iron powder to see if I can make the elusive blue sapphire.

So I hope to be able to share further progress with you all.

Edit:

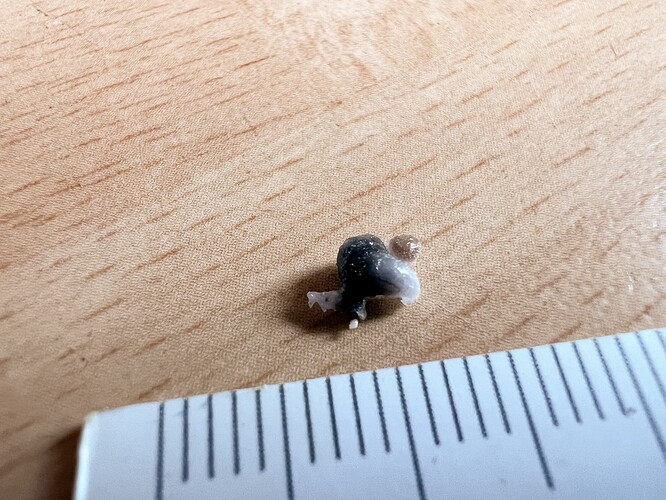
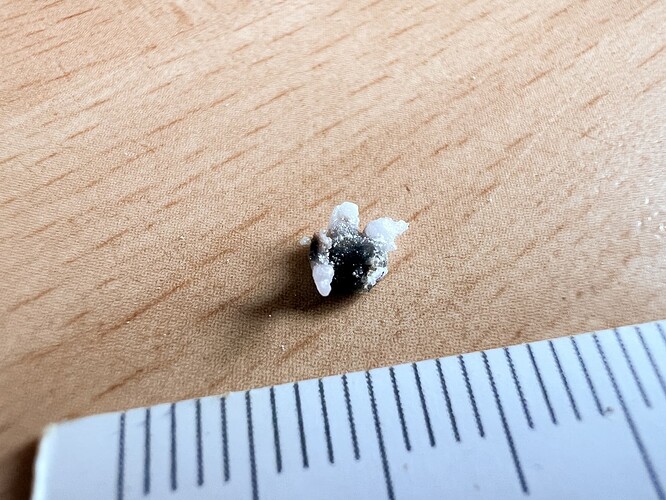
Some closeups of some of the crystals.

And under closer inspection I have discovered at least two microscopic blue sapphires.

Note: The image has had to be altered to show the blue tint. It was very hard to capture it on my phone.
3 Likes

Very interesting stuff, Curtis! I am looking forward to seeing you make blue sapphires.

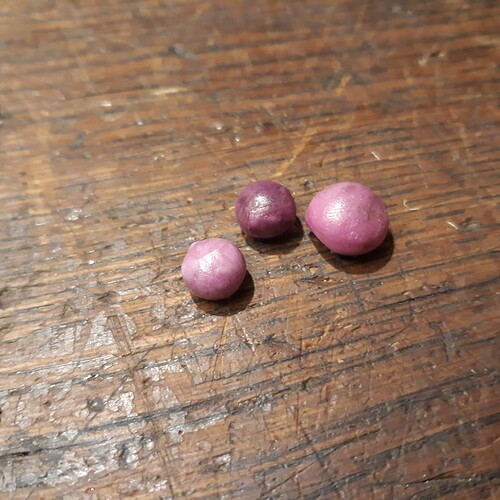
I actually experimented with making rubies myself but instead of using a laser I used an arc welder with a graphite base as ground and a graphite rod electrode to strike the arc. I used “microdermabrasion crystals" for some sort of cosmetic skin cleaning purposes, which are extremely pure white corundum. The rather grey-ish unpure stuff from ebay (even though sold as 99.99% pure) produced black crystals. From eBay I bought some green Chromium oxide powder (sold as a dye). Those together made some bright pink rubies, though very polycristalline.


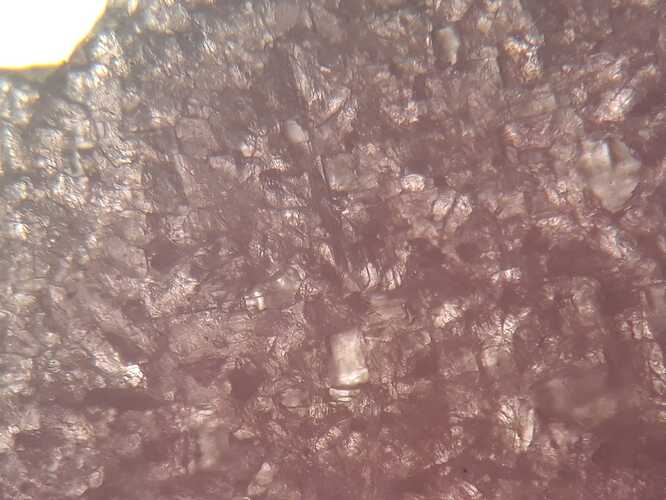
I even cut one and looked at it with a microscope:

I’ve got a short article on my website if you’re interested in the details.
The whole process using the arc is kind of messy, it spews the powder everywhere so maybe using a co2 laser makes it more controllable.
I always wanted to try to “anneal” the crystal by heating it up in a kiln and letting it cool down slowly but never got around to doing that.

Good luck in this project! I’ll definitely be following your progress :slight_smile:

2 Likes

Nice Nik!
Steel dust is obviously not the most ideal dopant for making pure corundum varieties. However it turned out to be way more effective than I imagined. I did succeed in making blue sapphire however the crystals are very small and require the right amount of light and angle of incidence to be visible.

So using pure chromium powder should result hopefully in a more pure ruby set.

I got plenty of black sapphires. Based on the fact that impurities led to their creation for you too, I can safety say that they must be a product of impurities. Hence very they are most common and considered low quality by gem sellers.

Your process is essentially the same as my own. It just intense heating of the oxide until molten. However the laser allows more localised and precise heating. I’m wondering if I can get the control right to the point I can almost manually 3D print corundum. When I heat up an area of around 7mm2 with the laser approximately 2-4mm2 of crystal is allowed to form. The fluctuations could be due to irregular dopant material and the fact the oxide is heaped rather than flattened. So as long as the laser overlaps the region it last heated it generally reheats the previous crystal and allows the new one to coalesce.

Another thing to point out is that the rubies were translucent. Which is a positive outcome. The pale pink blobs seemed to fluoresce well.

cool experiments! i especially like the idea of “3d printing” ruby, i’d imagine if you did then the process would look a lot like metal printing, depositing an even layer of Al2O3 on top of and around the last layer. ‘Annealing’ these rubies could be a good idea too, although i’d imagine you’d basically have to get them to sintering temperature for any effect to take place. Thanks for sharing!

1 Like

I’ve got a few ideas to try. I may be able to use a shorter focal height a quicker speed to produce these crystals yet. If I can it will be really beneficial as I will have more control over the size of the crystal produced and may be able to selectively control what regions crystalise. I just want to see how big a crystal I can form.

For me personally, translucency rather than size is interesting. Imagine making a ruby laser with a small homemade (even a few mm in length) ruby crystal… Now that would be truly innovative. Even as a gem just for display… I suppose, the ingredients for this would have to be very pure and the crystal would need to cool down quite slowly, to prevent polycrystalline structure. Probably outside of the scope of what a hobbyist can do, but theoretically doable with a way of reaching ~2100C controllably.

I’ve been giving some thought of doing just that funny enough. The fact that the crystal is small rather than the large lengths bought surplus and that i can control the doping as I’m making it myself means I could potentially make an ideal crystal for cw operation. I wouldn’t have to worry about the shape of the crystal. As long as two ends are flat and polished it will work for end pumping. The challenge for me however is cutting and polishing a mohs hardness 9 crystal. I don’t think I have anything at work that will cope.

Creating larger crystals probably will lend itself to forming polycrystalline structures. However I can fuse crystals together quite easily.

I don’t know if you maybe found this already, but it actually made a DPSS cw ruby laser some time ago using a professionally made and AR coated crystal and a 405nm LD. So it is definitely possible, against what some people said.
I also tried to use a “DIY” ruby by cutting one of those tank rangefinder rods. Rough cutting using a diamond disk dremel, sanding with SiC sandpaper (with hard+flat backplate) and polishing with 1um diamond paste worked, though sanding took a loong time. For sanding, use a grinding block with the crystal in the middle to keep the surface flat and have something to hold onto. Just like you would when repolishing a fiber.


(DIY one is the right crystal).
In the end, sadly the laser didnt work with the DIY crystal, probably because of the missing AR coating. A brewster cut crystal might work though, or just having the crystal inserted at brewster’s angle. Ultimately, I did this because the DIY crystal hat polished sides, so side pumping would be possible.

Anyways, if you get a sizable clear ruby with the right doping from your method, I think making a laser out of that would be one of the coolest DIY projects I’ve ever seen.
And even if that doesn’t work, producing gems with laser is pretty cool anyways :slight_smile:

1 Like

Cutting and polishing them is probably the most daunting part for me. Incredible job getting a DIY crystal looking that good. That’s not an easy job. I have done some glass work before.

Have you considered it may not have been due to optical losses but instead due to the doping? If the crystal is producing loss then it might have needed more chromium to counter it.

I agree, if achieved it would be one cool project.

I am in the process of ordering Chromium, Titanium and Iron Oxide. As well as my own personal stash of Aluminium Oxide. I’ve done some research into colourations of corundum so fingers crossed things go well.

I’m probably going to use the rest of the aluminium oxide I was given to see if I can get the crystal formation down more.

Yeah, doping might be a big factor. The DIY ruby definitely has a different color. I’d try brewster cutting it (got some ruby left) but I am absolutely swamped with other projects and work atm.

Another interesting project would be an image furnace for producing big monocrystalline crystals. But the time…

Good luck with the CO2-laser project, really cool idea!

https://opg.optica.org/osac/fulltext.cfm?uri=osac-2-1-184&id=403683

The paper adopted the typical dopant amount of 0.05% for lasing.

So no actual difference between the CW and pulsed lasers in doping quantity there.

This one achieved better output with a shorter crystal.

https://iopscience.iop.org/article/10.1088/2399-6528/ac1b70

The output seems comparable to your own.

The amount dopant though is so small. That’s only 0.5g of Cr3+ for every 1kg of Cr3+Al2O3!

1 Like

@NiklasH

Cool PDF for you.

USAF investigation into ruby from 1966.

1 Like

I actually got my cw ruby crystal from one of the authors of those two papers, we have been in contact for about two years, also regarding the Pr:YLF. Maybe the different color them comes from the AR coating.
The investigation paper is awesome! So detailled… Just wow.
Darn, now I can’t stop thinking about making rubies :slight_smile: A homemade Verneuil Furnace might be totally achievable if you have hydrogen and Oxygen.

1 Like

I have a process in mind right now, that I might be able to pull off at work if the process allows that is.
But I need to get myself some graphite tubing and graphite rod.
I have an idea of using the laser platform bed as a way of raising or lowering a graphite rod inside the graphite tube. I can then add a layer of oxide, melt it and then the lower the bed a fraction and reapply another layer. Might be able to start forming quite nice size crystals this way.

This would be a cheap and quick way of producing rubies if it works.

1 Like

Update 18/11/22:

So I have been playing around more with making better sized/more usable crystals.

I first experimented with better techniques for producing white sapphire as at the time the aluminium oxide was the purest substance I had. And white sapphire is just pure Al2O3 with no dopants. And I started to get better results in producing larger crystals. However I received the chromium (III) oxide powder, so I am going to skip ahead and show you the progress in making SLM (Selective Laser Melting) rubies.

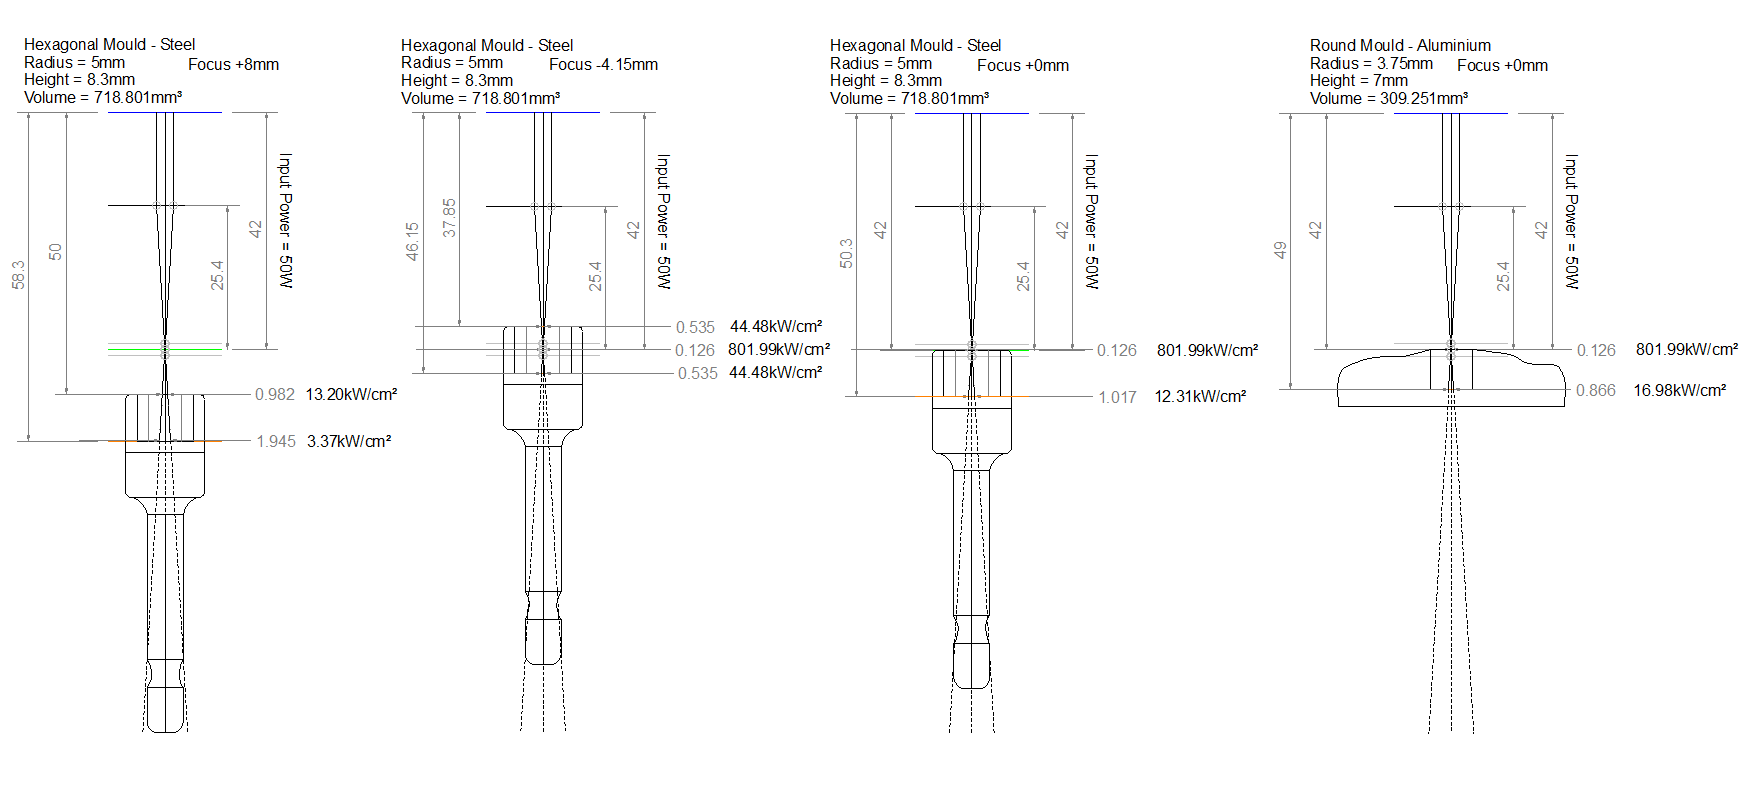
I decided to play around with making the crystals with various different focal heights and the last one is a different mould which I’ll get to explaining in a bit.

By varying the focal heights you can see the intensity within the mould changes. I wanted to see if increasing the intensity distribution would have any impact in keeping more of the crystal molten at any given time. In conclusion I found the laser being focused at the top of the mould was the most effective and easiest to setup. The crystal had better intensity distribution when focused half way into the mould. But it presented problems of the laser head being covered in hot aluminium oxide vapours. Increasing the focal length to 50.8mm may be the best alternative to this, however the spot intensity will be weaker under a longer focal length lens. But the Rayleigh length would also increase possibly making the distribution greater. I don’t currently have a co2 50.8 lens to try. So for now I have chosen to adopt a focus at top of the mould approach.


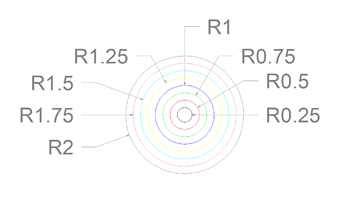
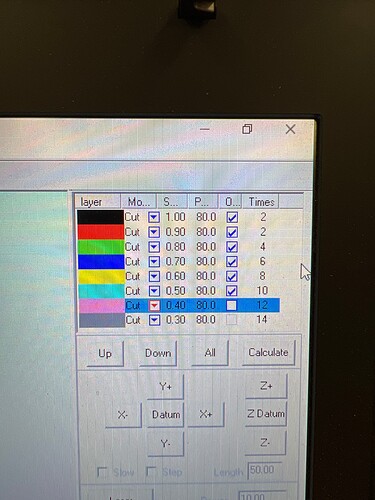
This was the cut route I have adopted. I decided to limit the file to the 1.5mm radius contour. As the cut duration increases significantly with each 0.5mm in diameter I add. As the diameter of the path grows, the laser head must be slowed down and rerun more times to not only achieve an equivalent amount of exposure but to exceed it. This then causes more time to reheat the already formed crystal and allow more molten oxide to coalesce with it. The multiple passes act as a way of cleaning up the join by repeatedly remelting and rejoining with the temperature rising in between exposures.

I found that I needed a small solid mould to allow me to build up the crystal vertically. Aluminium oxides powders bulk density is considerably lower than the density itself. After compacting the powder, I have found that I will need to repack the mould and then I can grow the crystal further. My aluminium dish was mainly focused on the horizontal packing, where I now needed something more compact and vertical and more thermally controlled.

I found myself a 10mm socket and placed it in a vice. I then packed it out with a Al2O3+Cr2O3 mix and began lasing.

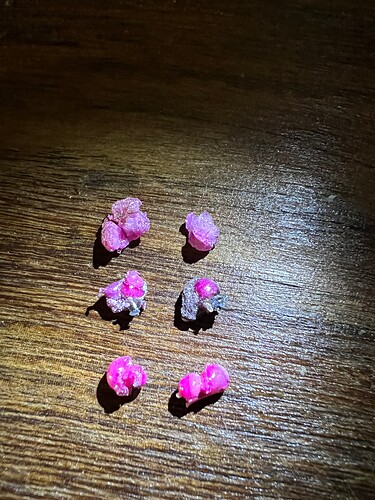
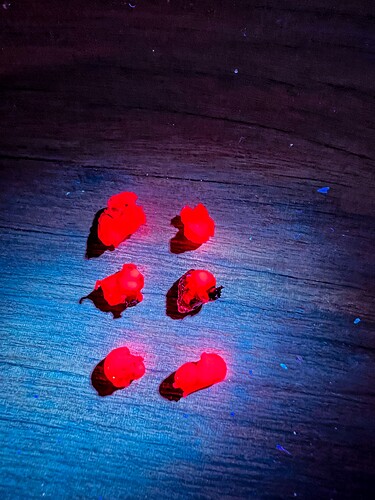
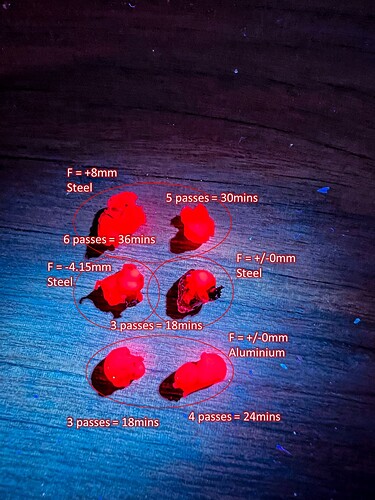
This is what the result looks from a focus +8mm run.


The result was my largest ruby crystal yet. The only issue is, it hadn’t coalesced too well, and it featured a nasty crack. The crystal then split into two sections.

I then tried the -4.15mm and +/- 0mm run. And this is where I started to notice positives and negatives.
The positives were I noticed better coalescence and the results yielded a decent size stable crystal.

The negatives however were the vapours produced on the -4.15mm run, and the presence of impurities. Black sapphire managed to reoccur in a pure Al2O3+Cr2O3 mix. The bottom of the crystal had formed a nice black base. And then it occurred to me the intensity was high enough to etch the steel mould. The steel mould was causing impurities under those high intensities. Haematite was again allowed to form and therefore the base of the crystals became black sapphire instead.

So I then went off quickly to search for an alternative. I chose to search for aluminium, as it wouldn’t cause any impurities to creep in as its a aluminium oxide in the first place I am melting. I had melted some aluminium into a ladle previously. So I decided to use that and just drill a 7.5mm hole into it.

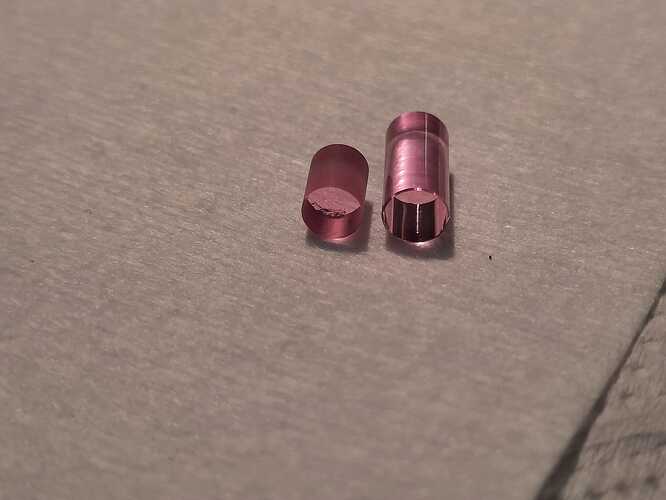
The results were much improved. The rubies were at least 99% pure after switching to a aluminium mould.


And now a collection of the latest progress samples.

And again another bonus, this time a strange one.

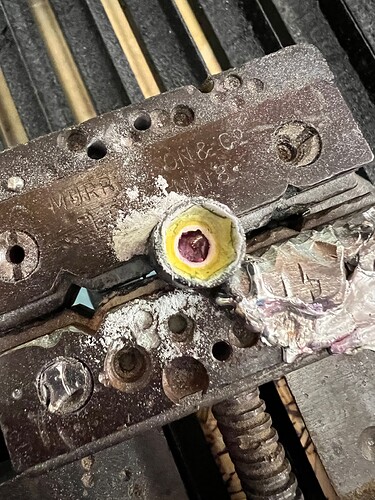
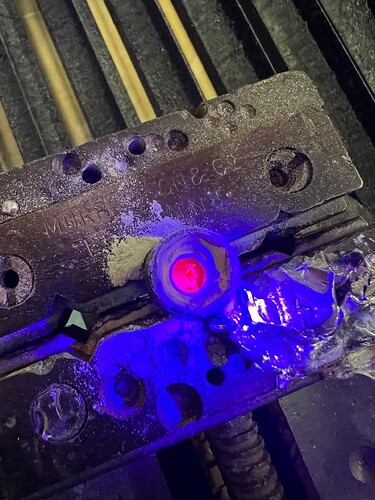
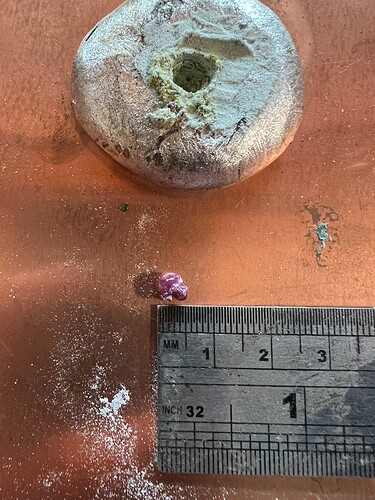
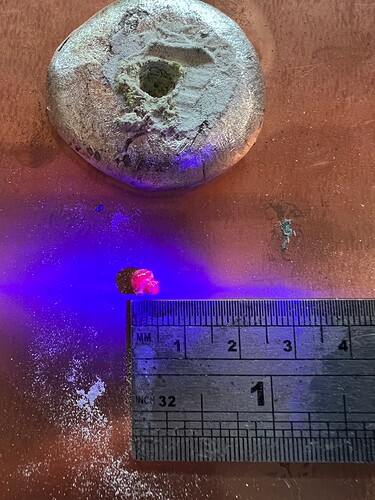
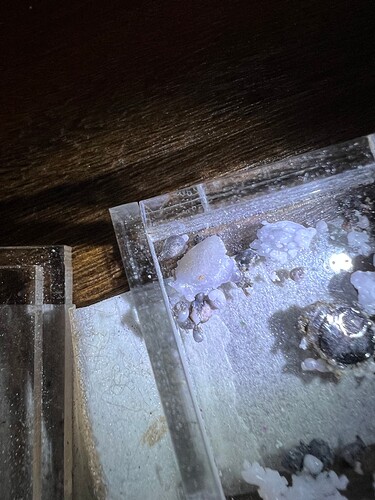
After observing one of my white sapphires under UV, I noticed a glowing yellow speck.

Turned out I had a small ruby inclusion. But this one doesn’t fluoresce red!

The fact that the white sapphire glows full stop shows that it has chromium present. However it glows a strange yellow line. Very difficult to photograph well. But the crystal speck has a similar red/pink with added yellow hue. And the speck definitely glows alternative to the typical deep red. I have also found another one with a weaker and smaller spot. So it was replicated. Another strange one is a very ordinary looking sapphire has a weak cloudy pale blue/white fluorescence, which I can only describe as being comparable to how amber fluoresces.

The aluminium mold likely contains other materials.
Most aluminium alloys contain stuff like magnesium, silicon, manganese, nickel, zinc and copper.
Likely that your yellow gem is caused by one of these impurities?

1 Like

My thinking is it has something to do with trace iron, the white sapphires were produced in the steel mould. However the intensities were lower (not damaging the mould). Maybe it was a case of a small quantity of iron oxide entering the pure aluminium oxide by tiny amounts of steel dust?

I’ve done some research and apparently yellow sapphires can be made with Fe3+ ions. And some synthetic yellow sapphires have exhibited orange and rarer still yellow fluorescence under longwave UV.

I have also seen an article that yellow fluorescence could be caused by other dopants, however it doesn’t specify what.

Small amounts of chromium and iron would have been present during the formation. But we are talking <0.01% quantities on this occasion.