Thanks Chris. If everything goes to plan, I’ll definitely be sharing regardless the instructions on building one so you can make that choice. You have 10W of 532nm to utilise. I’m just imagining now what sort of output you could get if it did lase.
Yep, it has analog modulation too, so by varying the voltage for that input control, I can adjust the output power from some hundreds of milliwatts to the full output power.
1 Like
Yes. That will be very useful. Especially when aligning. You don’t want full power for that.
1 Like
Why is it advantageous to have the lens sent to me to be forwarded, instead of directly to you?
I’m not purchasing a lens now. I have one in my collection that will work.
It was the output coupler. I need to have a VAT number in order to purchase it. VAT numbers applies to registered businesses in the UK, not individuals. You in Qatar don’t need one. Also I will be getting these sent to my place of work rather than home anyway as that is where I’m assembling it. We are on holiday now so best to wait until new year.
And then I just need a roc-50mm hr. But I’m going to look into that one.
My bad, I shouldn’t call an OC a lens, habit to use that term so broadly. OK, just reach out to me when ready for either or both.
Lol, no problem. Tbf, an output coupler is essentially a cross between a laser window and a laser mirror. I wish you and your family a great Christmas.
Everything is good here in Odessa. I do have some OC’s which are also curved though  That’s probably why I used that term without knowing if it was purely an OC or not.
Glad to hear it. 
It’s a shame you don’t have a curved oc of high reflectance. But I presume most of your optics are for nd:yag lines (1064,532etc) and they usually have T=80% not 98%+ like required
Btw, I was pleasantly surprised to find a curved oc equivalent only costs $40 more. I was expecting a lot more. Like $500-1000. It’s 75mm roc so would have to look at the cavity again. But might be worth it having a confocal vs hemispherical cavity. I’ll investigate it after Christmas.
1 Like
Good, hope you can get that one to work better. Yep, all of mine are for ND:YAG cavities.
1 Like
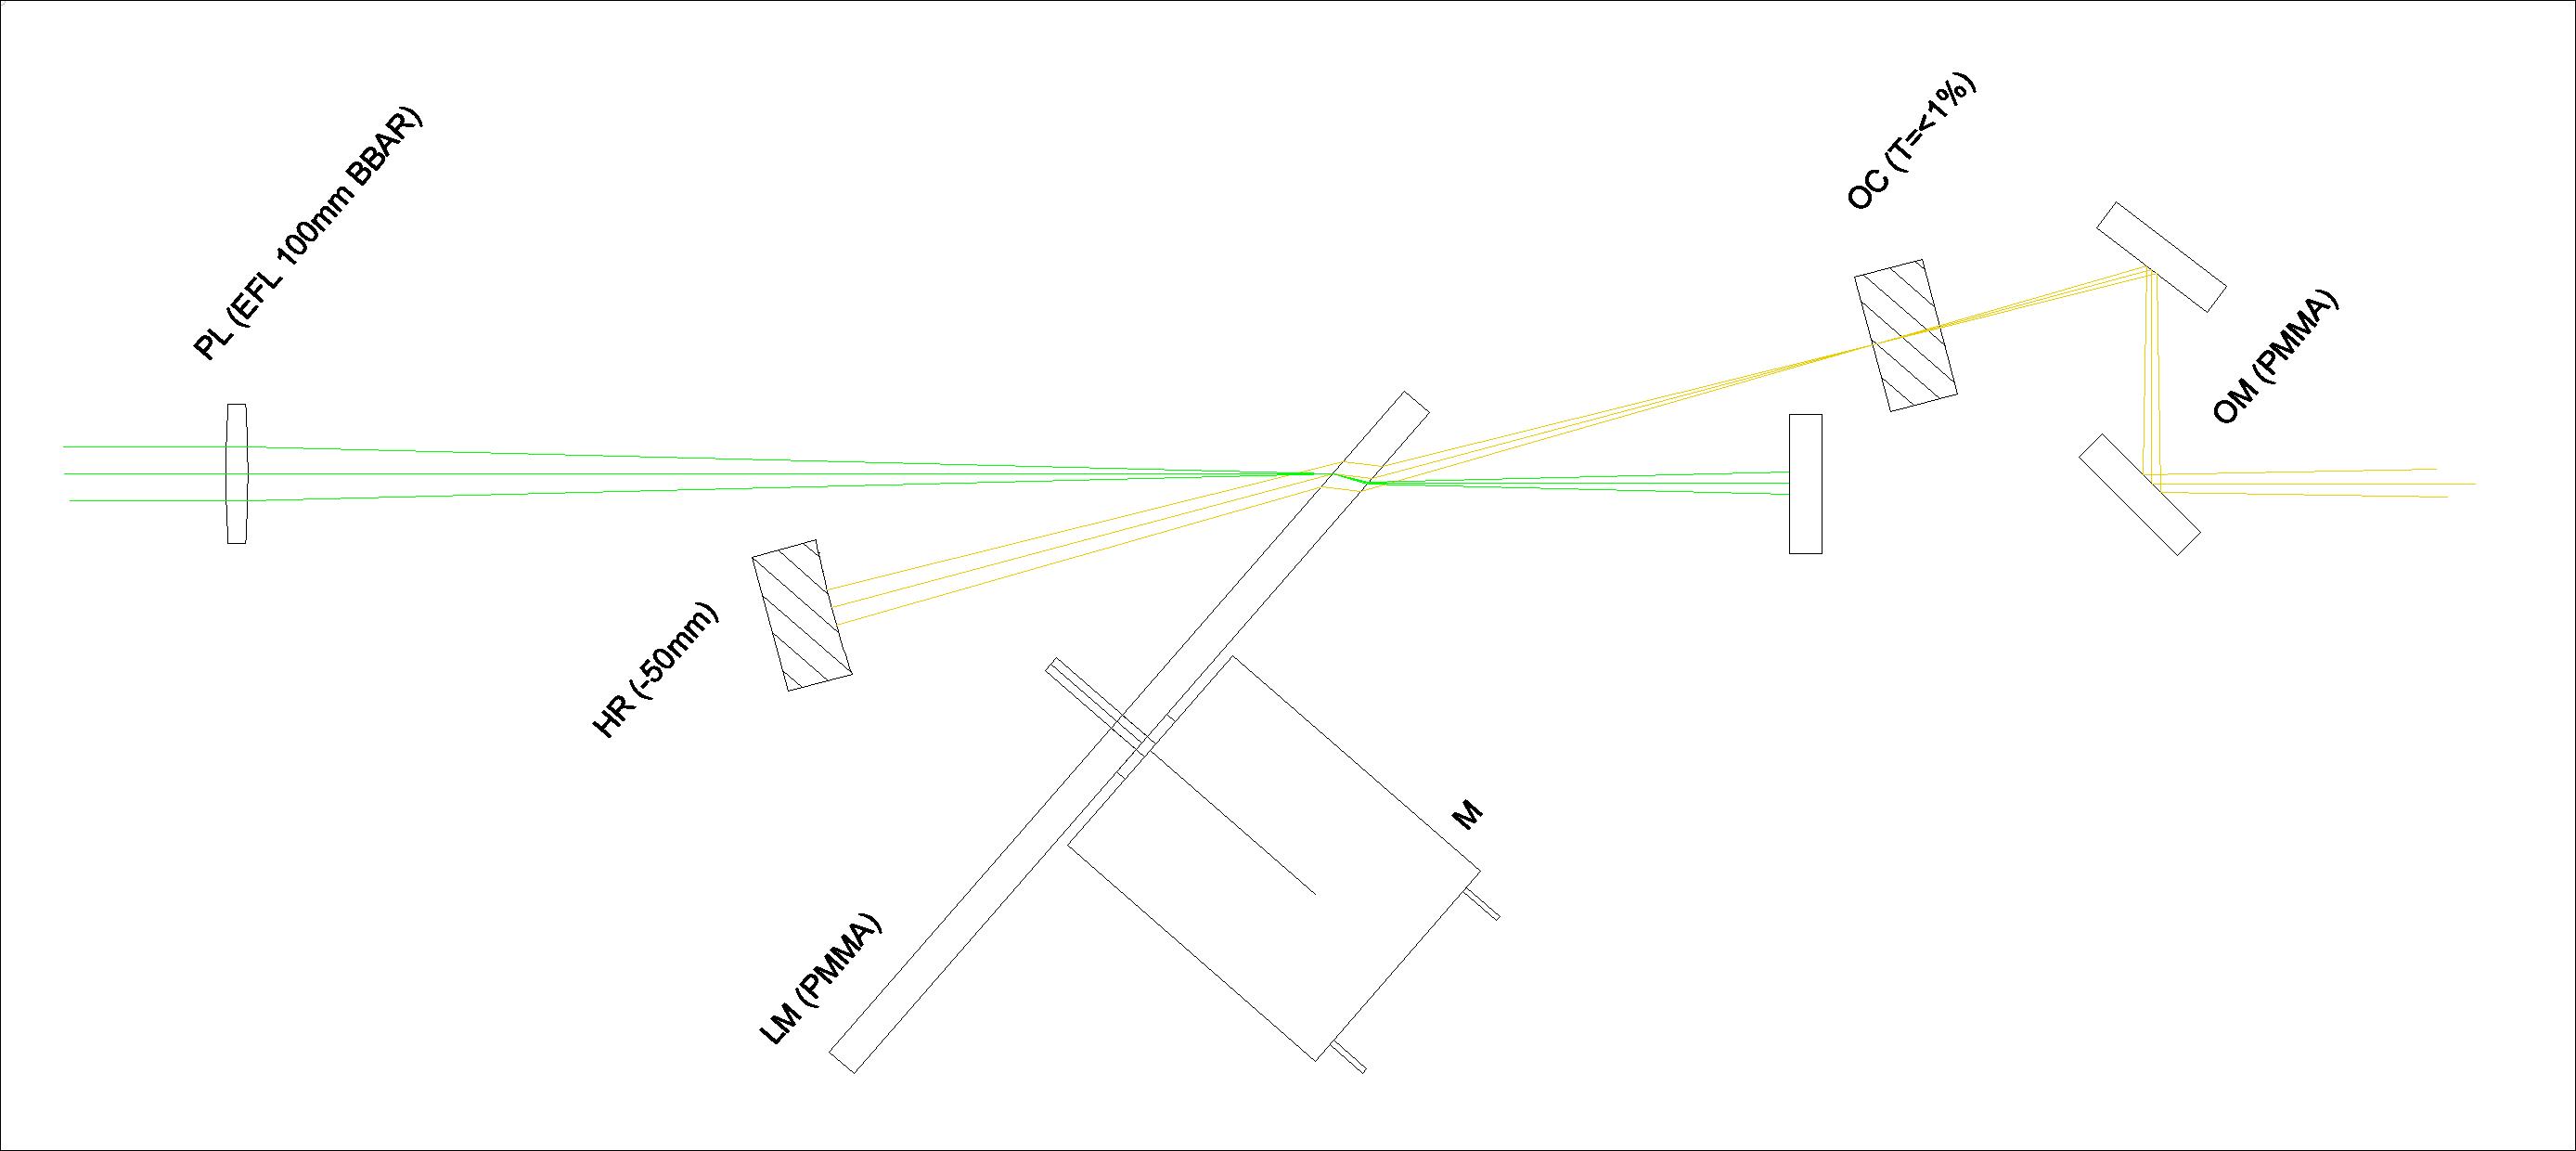
Creating a focal region within the cavity focused on the medium will definitely help increase the efficiency. I chose a flat oc to cut costs. However in light of finding a curved one it makes sense to try and utilise it. It will lower the lasing threshold, increase efficiency and lower optical losses/wastage. I’m hoping for 100-200mW output of 575-585nm if accounting for 1% transmission and foreign dyes.
1 Like
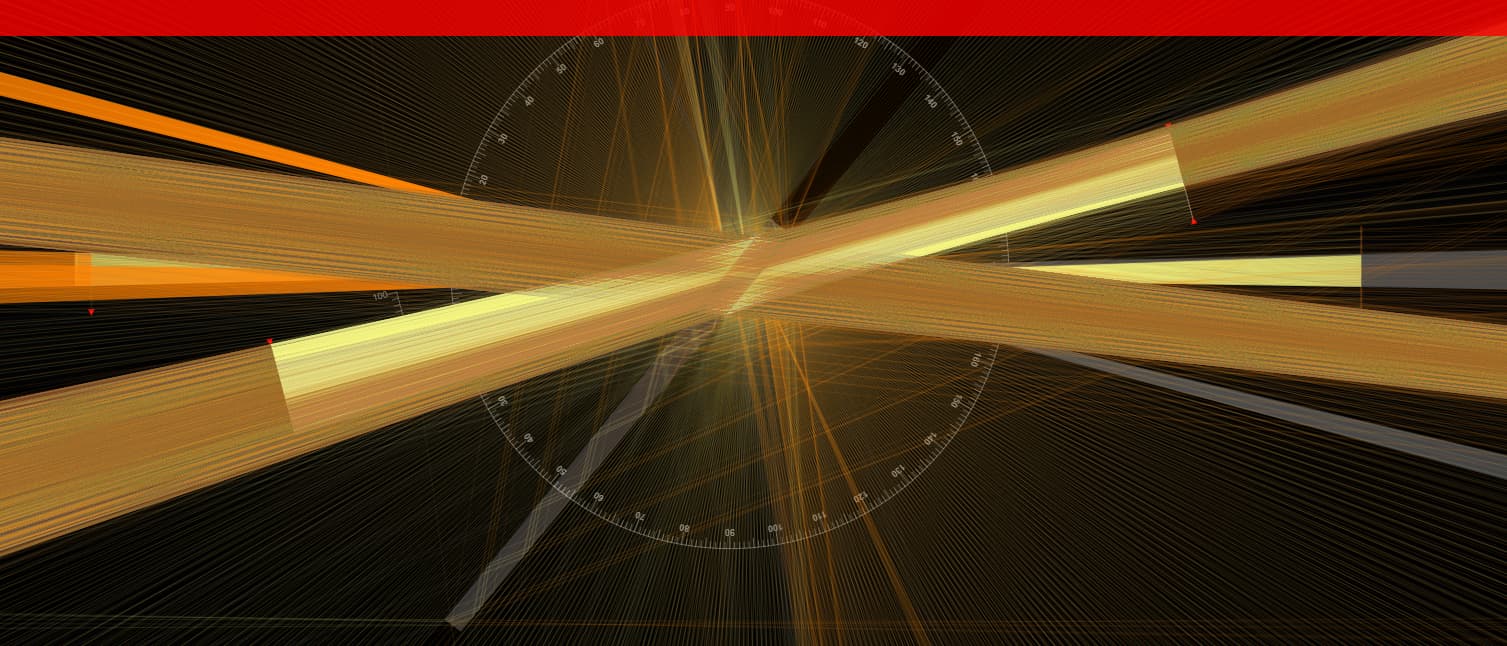
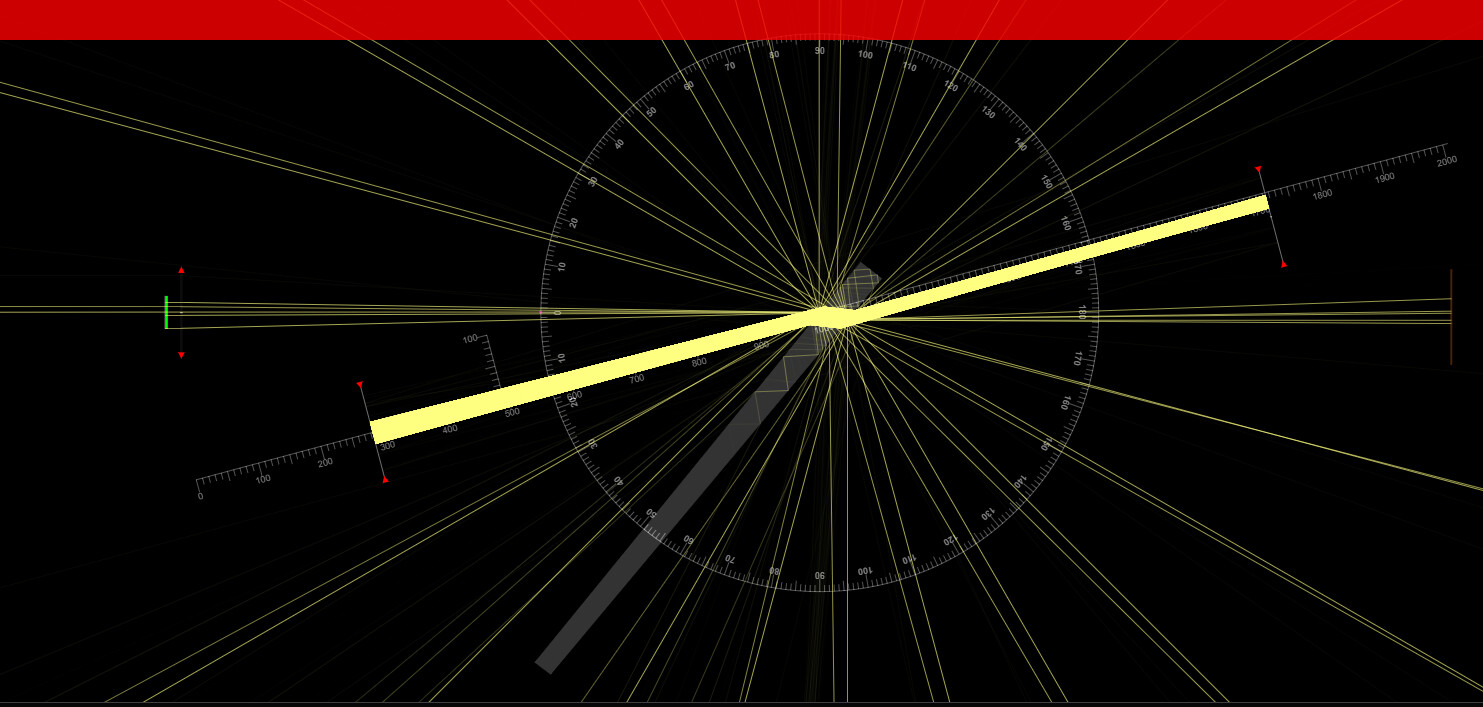
The cavity gain has drastically improved under a confocal configuration:
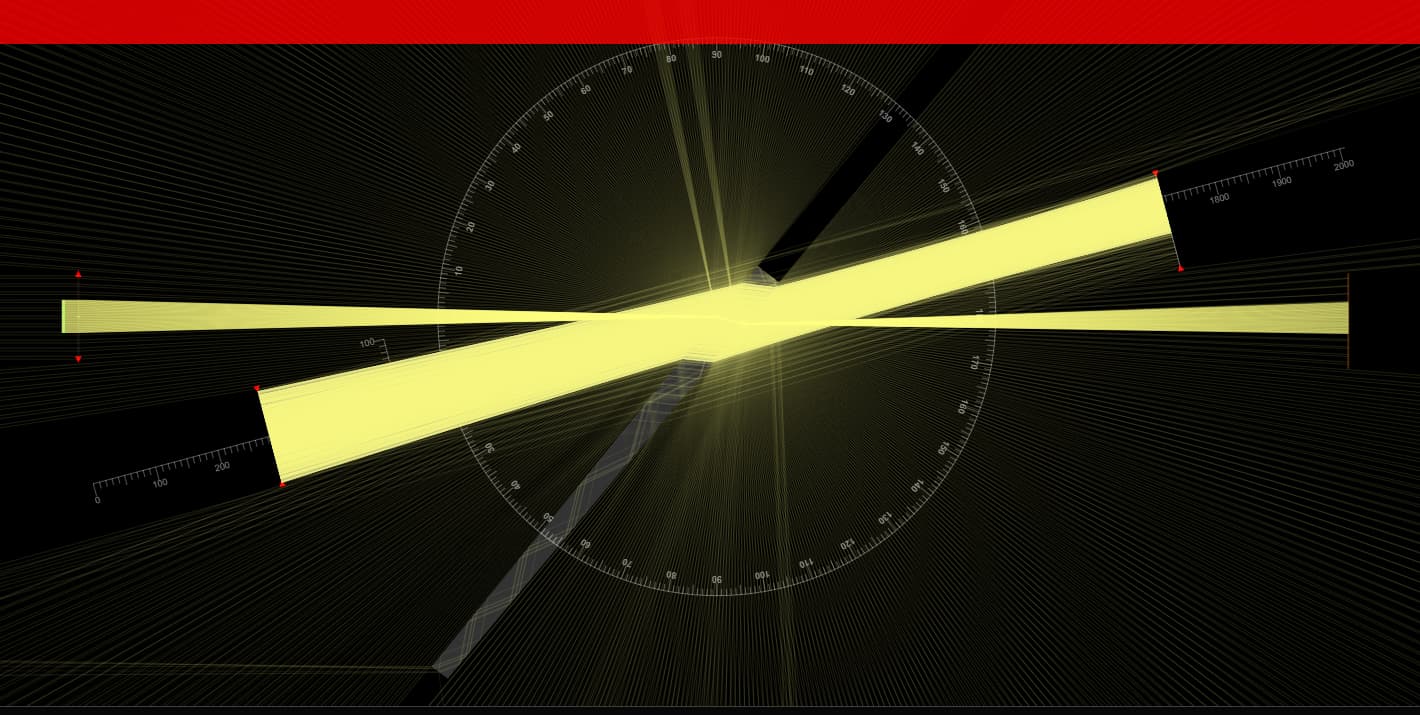
Here is the cavity with low density rays. Look at how tight that cavity is.
Old:
New:
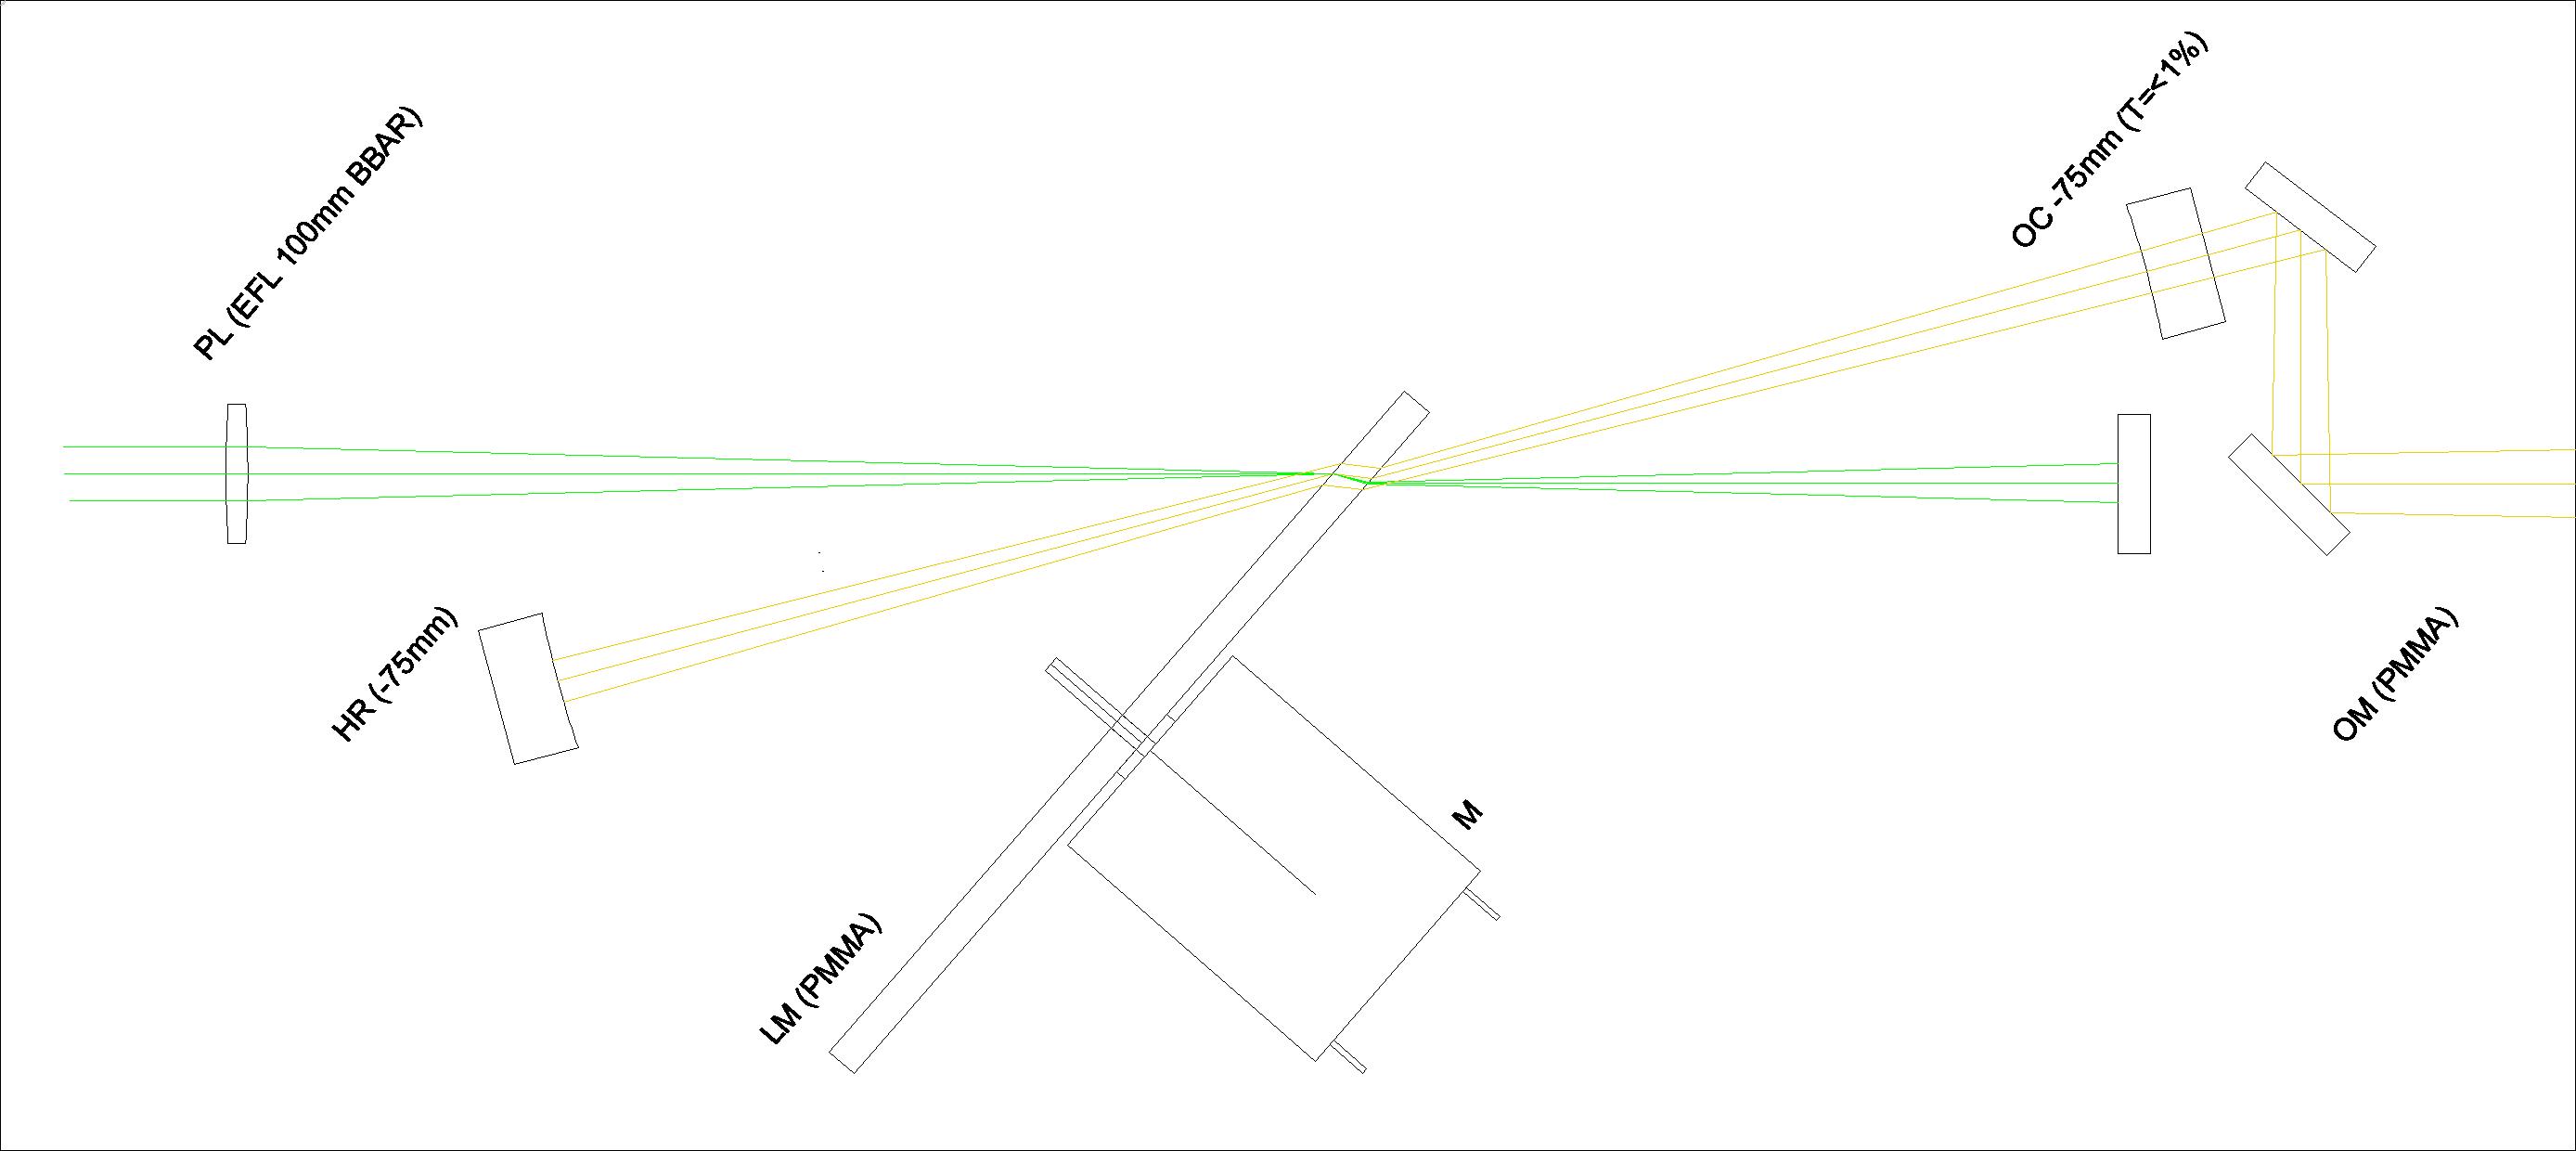
So the new layout requires a longer cavity length, however doesn’t alter the optical layout much at all. The laser remains compact.
1 Like
That is a happy finding
1 Like
Yes, it’s a Christmas miracle lol 
I’ve spent time redesigning the rotation mount as I found issues with my original version. This version will be a considerable improvement on the last however will be more complex to build. The old version incorporated a single gear reduction (10:180/1:18) that was at the very limit of what I could machine on a laser cutter. I used the 2° teeth separation of a 180 tooth cog and then made a 1° braking wedge to make and maintain 1° accuracy. However I foresaw issues in this method to maintain the accuracy needed as it would be incredibly difficult to fine tweak the angle with even a 1/4 turn of the input gear outputting 5°.
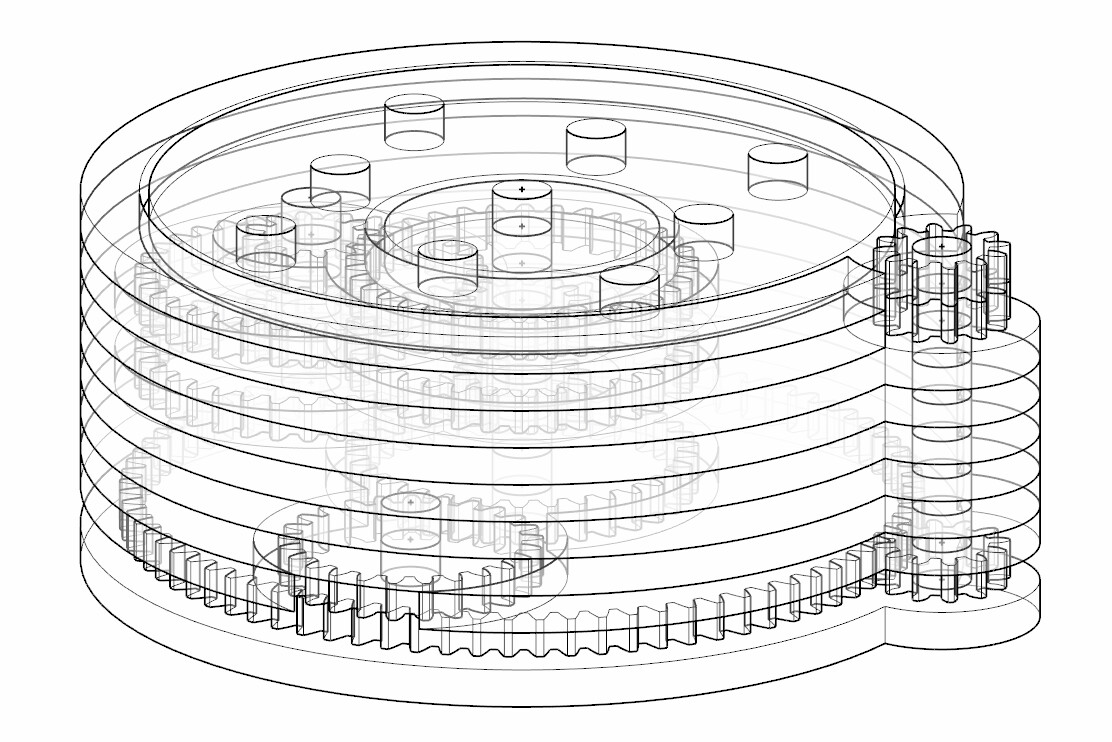
The new version is capable of a resolution of 0.84° (50.4 arcmin) per rotation of the input gear. I have engineered a stacked reduction gear set inside. Total reduction is the equivalent of (1:429.63) or 0.21° (12.6 arcmin) per 1/4 turn. Because of this resolution I have included a low res option too. This changes the system to (1:87.65) instead making it more manageable to change a large angle quickly. 4.11° per full turn, or 1.03° per 1/4 turn. High quality rotation stages are capable of 2.4 arcmin. And at the cost of 4mm of additional height and more acrylic I could get my stage down to just 0.1° (6 arcmin) if necessary.
2 Likes
Want to hear how much those optical mounts would of cost to buy instead of making? My setup for each mirror would of amounted to this:
| Eksma Optics | ||||
|---|---|---|---|---|
| Translation Stage | € 107.00 | £89.88 | $121.98 | 860-0010 |
| Lift Stage | € 419.00 | £351.96 | $477.66 | 860-0075 |
| Rotation Stage | € 186.00 | £156.24 | $212.04 | 860-0130 |
| Kinematic Mount | € 60.00 | £50.40 | $68.40 | 840-0054 |
| Setup per Mirror | € 879.00 | £738.36 | $1,002.06 |
Mirror Setup: 2xTranslation Stages, 1xLift Stage, 1xRotation Stage, 1x Kinematic Mount
I’ve just totalled up how much one of my rotation stages would cost to make already. I’m prepping the CAD/CAM files now for the others. The rotation stage will cost £2.75 vs £156.24. That’s a 98% saving! And I have upgraded them to 6 arcmin resolution whilst using more expensive 1mm acrylic for the gears. If they work then I will share with you the plans so you never have to pay that sort of money again for optomechanical components. It will make many projects within budget for hobbyists instead of only rich labs and institutes. Even if you factor in a paid for laser cutting service, that rotation stage would be cheap. The lift stage will be by far the biggest saving. The mechanism is complex hence the price, however I have designed my own. As its constructed nearly entirely out of 2mm acrylic, material costs are low. I don’t expect this mount to cost more than £2-3 to make.
1 Like
Another plus of saving money is all of the satisfying science juice you are able to squeeze out of the work of designing all of this.
Happy to see you are able to make your own gearing and mounts like that.
1 Like
Ironically the cheapest component is the hardest one for me to self make. The kinematic mounts. I’ve come up with an alternative however. I will just use a rotation stage on the vertical axis instead. It will act like a gimble mount instead of a kinematic.
I have some of those mounts, what size? How many?
1 Like
The cavity mirrors are 12.7mm and the fold mirrors are 25.4mm. In total there are 2x12.7 and 4x25.4.
But hold of for a minute. I’ll show you later what I have come up with as an alternative. Also I did a test in 3mm acrylic for the ordinary rotation mount to find if I have made any errors. Got a minor correction to make and then I should be able to get a working prototype soon before making the real thing. Then I’ll move on to the other stages.
1 Like